


Pinterest isn’t just a social media platform—it’s a visual search engine where millions of users actively seek inspiration, solutions, and products.
With over 450 million monthly active users and 97% of searches being unbranded, Pinterest offers an unparalleled opportunity for businesses and content creators to reach new audiences. But not all pins are created equal.
Understanding the anatomy of a high-converting Pinterest pin can mean the difference between content that gets lost in the feed and content that drives meaningful traffic and conversions.
Understanding Pinterest’s Unique Ecosystem
Before diving into pin creation, it’s crucial to understand that Pinterest users are in a different mindset than users on other social platforms.
They’re planners and dreamers, actively searching for ideas to implement in the future. This intent-driven behavior makes Pinterest users 47% more likely to make purchases compared to users on other platforms.
Your pins need to speak to this planning mentality while providing immediate visual value.
Step 1: Master the Optimal Pin Dimensions
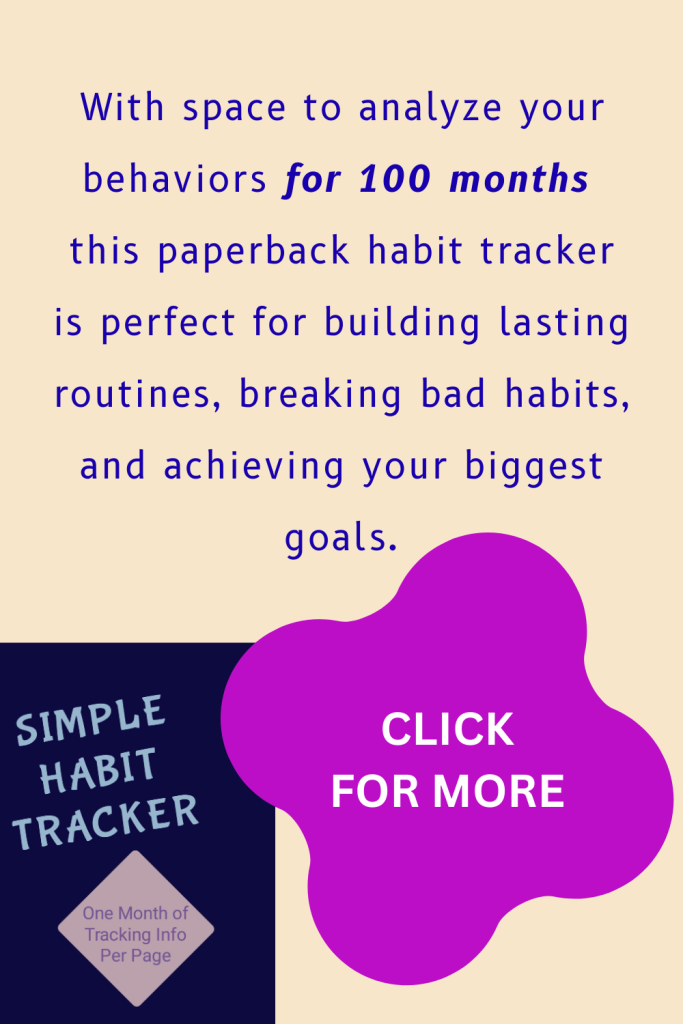
The foundation of any high-converting pin starts with the right dimensions. Pinterest’s algorithm favors vertical pins with a 2:3 aspect ratio, specifically 1000 x 1500 pixels.
While the platform accepts various sizes, this dimension performs best in the feed and provides optimal visibility on both desktop and mobile devices.
Avoid creating square pins or overly tall pins (exceeding 2:3 ratio), as these get truncated in the feed and receive less engagement.
The 1000 x 1500 pixel dimension gives you enough real estate to include compelling visuals and text without overwhelming viewers.
Step 2: Create an Attention-Grabbing Title Overlay
Your pin needs to communicate its value within seconds.
The title overlay—the text that appears directly on your pin image—should be bold, clear, and benefit-driven.
Use large, readable fonts that work well at various sizes since pins appear differently across devices.
Follow these guidelines for your title overlay:
- Keep it to 5-10 words maximum
- Use high-contrast colors (light text on dark backgrounds or vice versa)
- Focus on benefits rather than features
- Include numbers when possible (“5 Ways to…” or “10 Tips for…”)
- Choose fonts that are easy to read—avoid overly decorative scripts
Position your title in the top third or center of the pin where it won’t be cut off by Pinterest’s preview window. Remember that users scroll quickly, so your title needs to stop them in their tracks.
Step 3: Design with Brand Consistency
High-converting pins maintain visual brand consistency while standing out in a crowded feed. Develop a recognizable style that users can identify at a glance.
This includes:
Color Palette: Choose 3-4 brand colors and use them consistently across all pins. Bright, saturated colors tend to perform better on Pinterest, with red, orange, and blue being particularly effective at grabbing attention.
Typography: Select 2-3 fonts that represent your brand personality and use them consistently. Pair a bold header font with a clean, readable body font.
Logo Placement: Include your logo or watermark subtly in a corner. Make it visible but not distracting—typically 10-15% of the pin’s total size works well.
Design Templates: Create reusable templates that maintain your brand’s look while allowing for variation in content. This builds recognition over time and establishes authority in your niche.
Step 4: Incorporate High-Quality, Relevant Imagery
The visual element of your pin should work harmoniously with your text overlay.
Choose images that:
- Are sharp and high-resolution
- Relate directly to your content
- Evoke emotion or aspiration
- Include people or faces when relevant (pins with faces get 95% more repins)
- Show your product or concept in action
Avoid cluttered images with too many competing elements. The image should support your message, not compete with it.
If using lifestyle photography, ensure the mood aligns with your brand and target audience’s aspirations.
Step 5: Craft a Compelling Pin Description
While the image gets users to stop scrolling, the pin description convinces them to click through.
Write descriptions that are:
- Front-loaded with the most important information in the first 50-60 characters
- Between 100-200 characters for optimal performance
- Rich with relevant keywords without keyword stuffing
- Action-oriented with a clear value proposition
- Formatted with line breaks for readability
Include a subtle call-to-action in your description such as “Learn more,” “Get the guide,” or “Discover how.” Be specific about what users will find when they click through—overpromising and underdelivering damages trust and reduces conversion rates.
Step 6: Optimize with Strategic Keyword Placement
Pinterest is a search engine, which means SEO principles apply.
Research keywords your target audience uses when searching for content like yours.
Use Pinterest’s search bar to find suggested keywords and related terms.
Strategically place your primary keyword in:
- Your pin title overlay
- The first line of your pin description
- Your board name
- The alt text of your pin image
Secondary keywords should appear naturally throughout your description. Focus on long-tail keywords that indicate search intent, such as “easy weeknight dinner recipes” rather than just “recipes.”
Step 7: Add a Clear Call-to-Action
High-converting pins guide users toward a specific action. Your CTA should be visible and compelling, whether it’s:
- “Click for the full tutorial”
- “Download the free guide”
- “Shop the collection”
- “Get the recipe”
- “Read more”
Consider adding a small CTA button or arrow graphic that points toward where users should click.
Visual cues like arrows or “Read” buttons can increase click-through rates by creating a clear path to action.
Step 8: Test Multiple Pin Variations
Never rely on a single pin design for important content. Create 3-5 different versions of the same pin with variations in:
- Title wording and positioning
- Color schemes
- Image selection
- CTA placement
- Design layout
Pin these variations to different boards over time, not all at once. This strategy, called “test pinning,” helps you identify which elements resonate most with your audience.
Track performance through Pinterest Analytics to see which pins drive the most engagement and traffic.
Step 9: Ensure Mobile Optimization
Over 80% of Pinterest users access the platform via mobile devices. View your pin designs on a smartphone before publishing to ensure:
- Text is readable at small sizes
- Important elements aren’t cut off
- Colors maintain their vibrancy on different screens
- The overall composition works vertically
What looks perfect on a desktop monitor might be illegible on a mobile phone. Mobile-first design is non-negotiable for high-converting pins.
Step 10: Link to Relevant, High-Quality Landing Pages
The most beautiful pin in the world won’t convert if it leads to a broken link, irrelevant page, or poor user experience.
Ensure your landing page:
- Loads quickly (under 3 seconds)
- Delivers exactly what the pin promised
- Is mobile-responsive
- Contains a clear next step for visitors
- Matches the visual style and tone of your pin
The pin-to-landing-page experience should feel seamless.
If your pin promises “10 Budget-Friendly Home Office Ideas,” your landing page should prominently feature exactly that content, not force users to hunt for it.
Measuring Success and Iterating
High-converting pins are the result of continuous testing and refinement. Track these key metrics in Pinterest Analytics:
- Impressions (how many times your pin was seen)
- Saves (formerly “repins”)
- Click-through rate
- Outbound clicks to your website
A high-converting pin typically has a save rate above 1% and a click-through rate above 0.5%, though these benchmarks vary by niche. Use your data to identify patterns in your best-performing pins and replicate those elements in future designs.
Conclusion
Creating high-converting Pinterest pins is both an art and a science.
By following these ten steps—from optimizing dimensions and designing with brand consistency to crafting compelling descriptions and linking to quality landing pages—you’ll create pins that not only catch attention but drive meaningful action.
Remember that Pinterest success rarely happens overnight.
Consistency, quality, and strategic optimization compound over time, turning your Pinterest presence into a powerful traffic and conversion engine for your business or blog. Start implementing these principles today, and watch as your pins transform from pretty images into powerful marketing assets that deliver real results.
